Without guarantee, most of the data are from the WWW or the Renault manuals (P.R.884 / P.R.1054 / M.R.128), if the information is from me it appears out of the text context
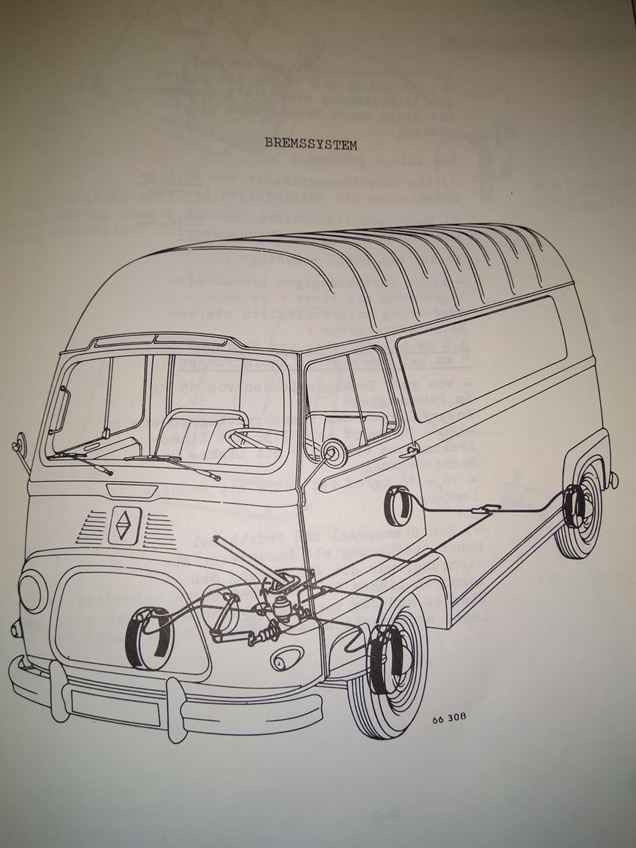
Single-Circuit Brake System
The single-circuit brake system is equipped with a simple main brake cylinder (without brake booster) – one output goes via a T-piece to the front wheels. The other connection is connected to the rear wheels via a T-piece attached to the rear axle. There was a R2137 single-circuit version with “Master Vac” brake booster
Dual Circuit Braking System
In the MR128 manual, Sweden and Switzerland are special mentioned and were probably the first countries to be supplied with the dual circuit braking system Estafettes. A corresponding legal regulation was introduced in the EC as well in 1973. According to P.R.884, the single-circuit braking system was still in use until 1976

The Estafette is a so-called “four- and two-wheel braking system”: the four- and two-wheel braking system is also referred to as HT split. All wheels share a common brake circuit. The second brake circuit is independent and controls only the brakes of the front axle. For this reason, the front axle wheels also have two brake cylinders (respectively, the Estafette has two brake chambers per cylinder).
First circuit: the two rear chambers are coupled to the two rear brake cylinders
Second circuit: the two front chambers are coupled together.
Main Brake Cylinder
With the Estafette models different master cylinders were used in parallel.
Here only the last 3 used versions are described.
For the two earlier versions (before 67) I would like to refer to Anciens:
https://vehicules-anciens.fr/fr/shop/maitres-cylindres-estafette
Single-circuit main brake cylinder Ø 20. 63mm
From 1967 onwards (R213, R2134 . . . R2137)
according Anciens already from 1964
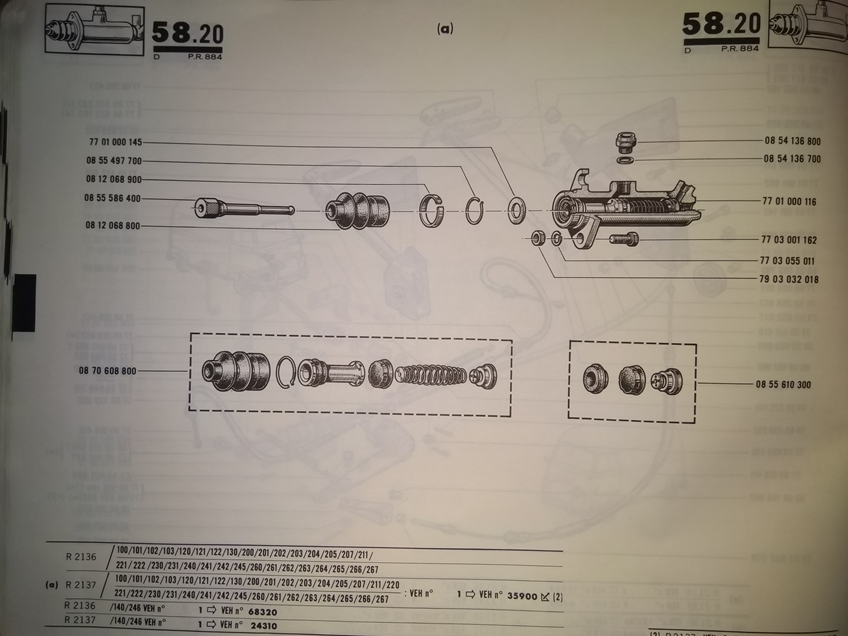
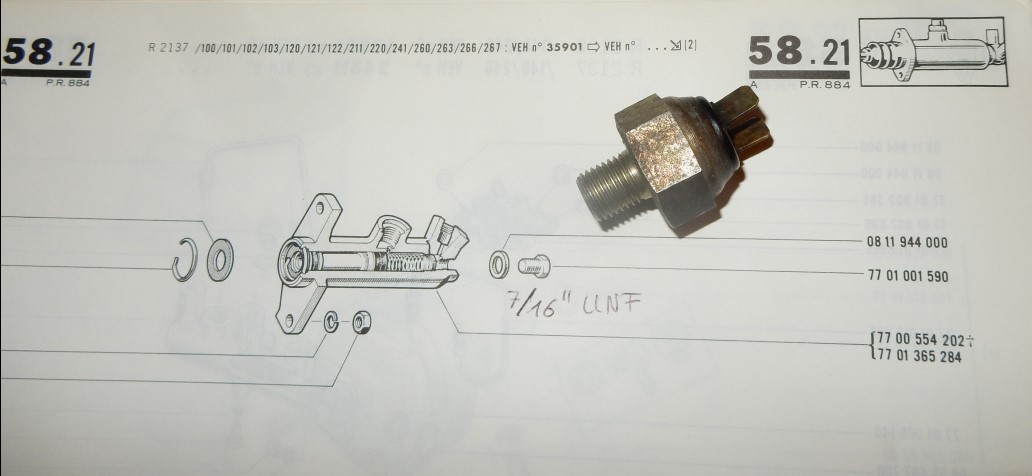
single-circuit with mechanc stop light switch FAE 21040 (7/16″ UNF)
https://vehicules-anciens.fr/fr/shop/contacteurs-feux-stop-estafette
Single-circuit main brake cylinder Ø 19.05mm
From 1972 to 76 (R2137 only), it was used together with the “Master Vac” brake booster. The currently available version does not seem to have a connection for the brake light switch – according to MR128 the connection was closed with a screw ( 7/16″ UNF – Same thread as for the seat belts)
-> early version single-circuit with mechanc stop light switch
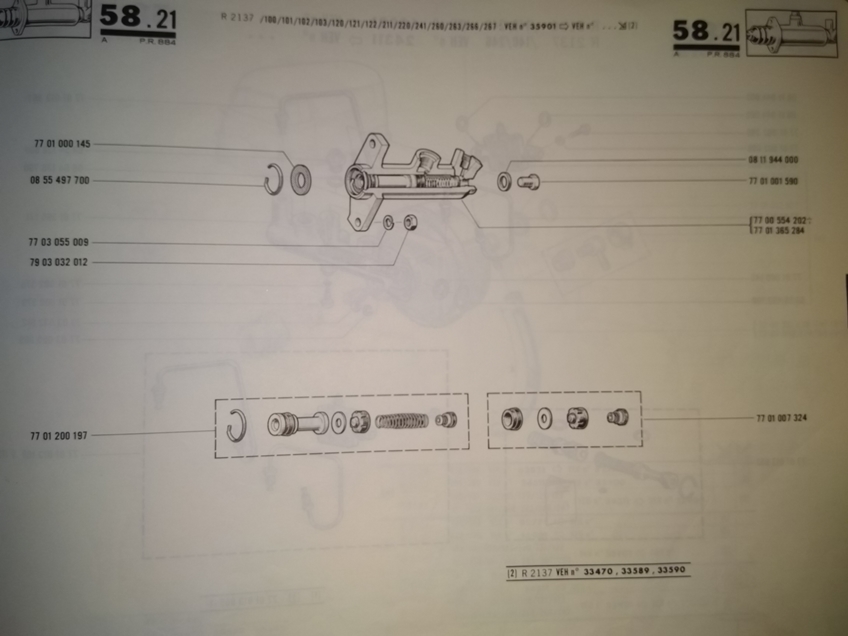
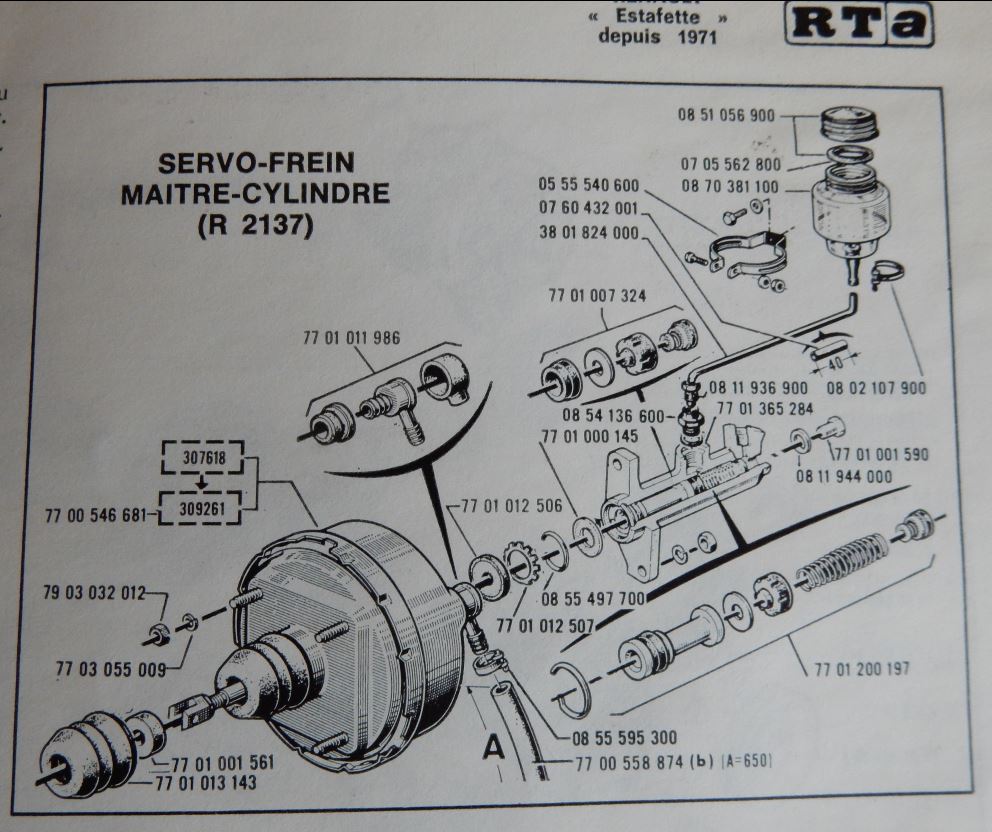
Double-Circuit Brake Cylinder Ø 19.05mm
From 1972 to 80 (R2136 & R2137), was used with the “Master Vac” brake booster. This cylinder does not have a connection for the brake light switch.
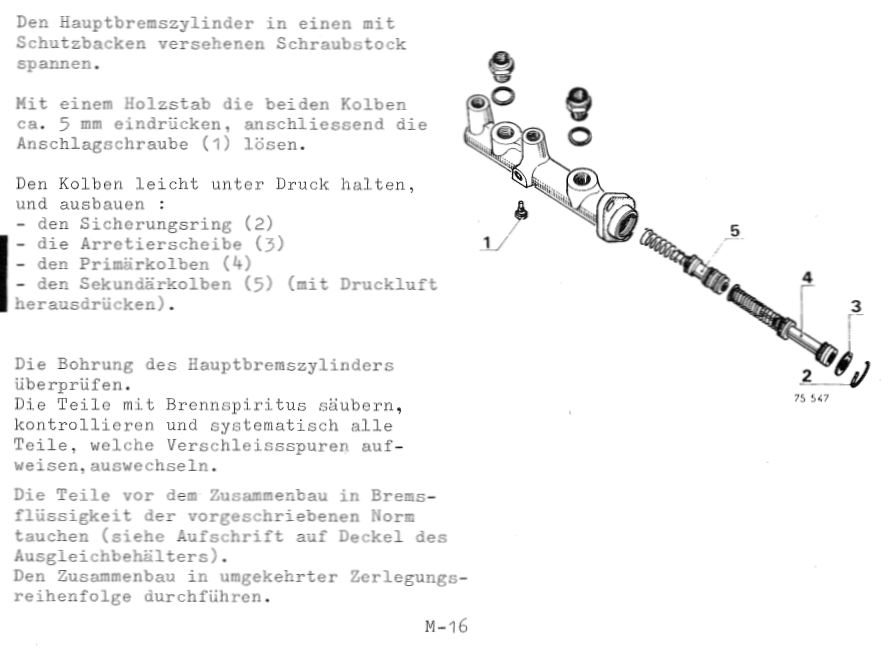
Main Brake Cylinder Reworking, Tolerance ?
I have not reworked any master cylinders myself, and think that you would have to have a professional stationary honing machine to get a good quality (cylindricity / conicity and surface) Also, the Ø with 19mm is too small for the common hobby honing tools for the drills. Especially the dual-circuit tandem cylinder has a respectable length, so there is a great risk that you do even more damage to the bore. Here I would advise against reworking – except for cleaning. The cylinder wall must be smooth and it should not have any irregularities (e. g. corrosion rings in the area of the rest position of the sealing collars).
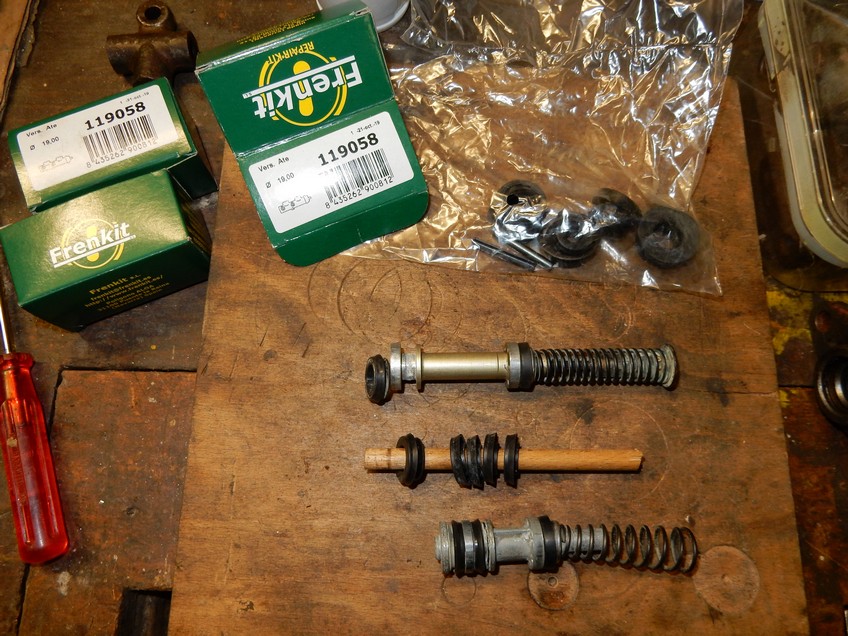
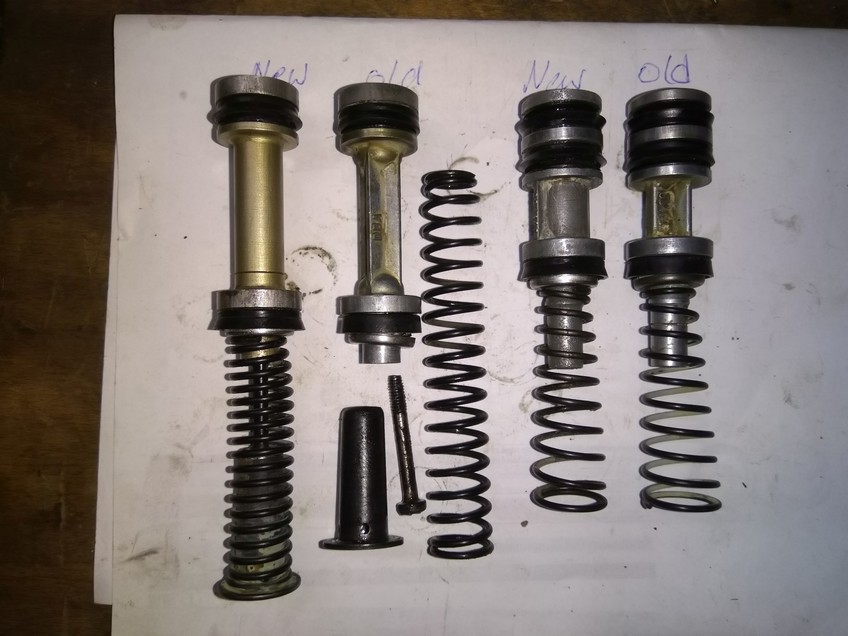
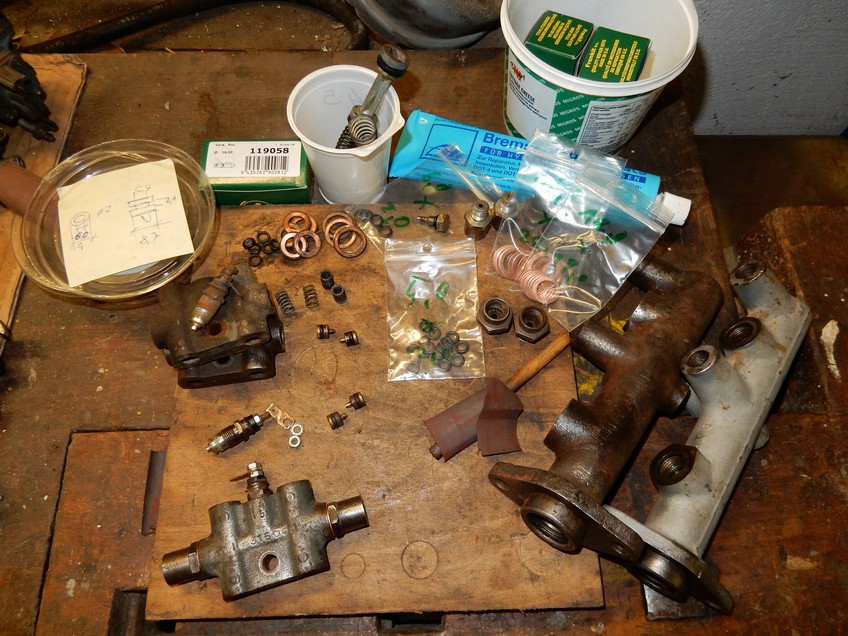
Repair Kit Main Brake Cylinder
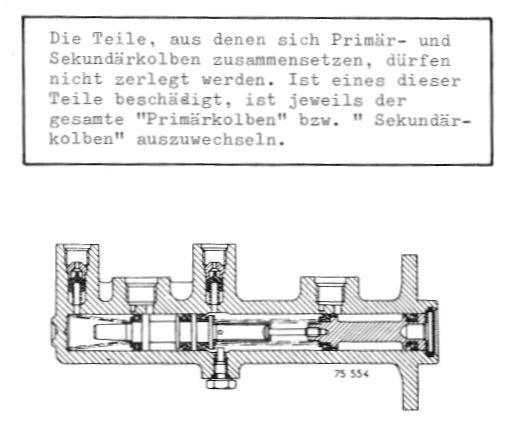
For the single cylinder, there are kits with the lip seals, and sometimes a repair kit including the piston rod is offerend – probably New-Old-Stock (NOS). However, for the dual circuit cylinder, I only found single lip sealing sets. According to MR128, the main brake cylinder piston rods themselves may not be dismantled. That means if you want to re-use a good cylinder you have to violate the MR128 (!).
Repair Kit Single-Circuit Brake Cylinder (Ø20.63)
RENAULT: 855610300
(FRENKIT: 119006, 120007, both not verified myself)
https://www.franzose.de/de/Renault/Estafette/Hauptbremszylinder/ANR84291/
Repair Kit Single–Circuit Brake Cylinder (Ø19.05)
RENAULT 7701200197
https://www.franzose.de/de/Renault/Estafette/Hauptbremszylinder/ANR84293/
Repair Kit Double-Circuit Brake Cylinder (Ø19.05)
RENAULT 7701200762
RENAULT 7701201663
RENAULT 7701013853 (P.R.884, P.R.1054)
(FRENKIT 119058 not fully identical / SEINSA D1053 not verified myself)
https://www.franzose.de/de/Renault/Estafette/Hauptbremszylinder/ANR84256/
https://www.franzose.de/de/Renault/Estafette/Hauptbremszylinder/ANR74471/
The pictures of the offered repair sets in WWW are served by fuzzy pictures and the content of the sets cannot be clearly identified. Some of the repair kits also contain parts that are not needed
There are also strong price differences of several hundred percent
Guided by the reference list on yoyopart.com i found FRENKIT 119058 and have – because cheap – purchased 3 pce on Ebay.de
Unfortunately the content was incorrect – for the wide 3 sealing lips (red) the set contains only one pc, but for the slim two (bleu) , however we have 4 pce
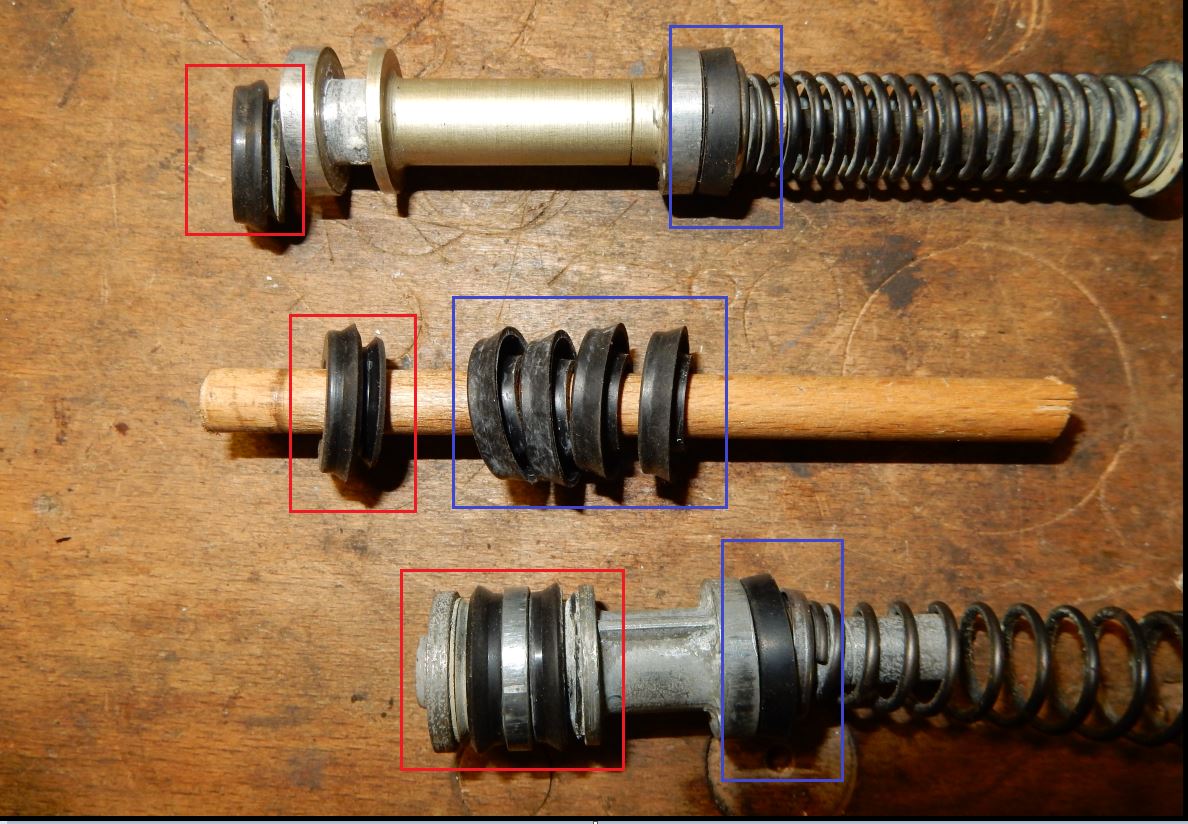
Double-Circuit Brake Cylinder change Sealing Lips
In case that the the old sealing lips are in good condition and are not yet really worn (i. e. they have no injuries, the rubber has a propper consistency and the lip has a sufficiently sharp edge), i myself did reuse them.
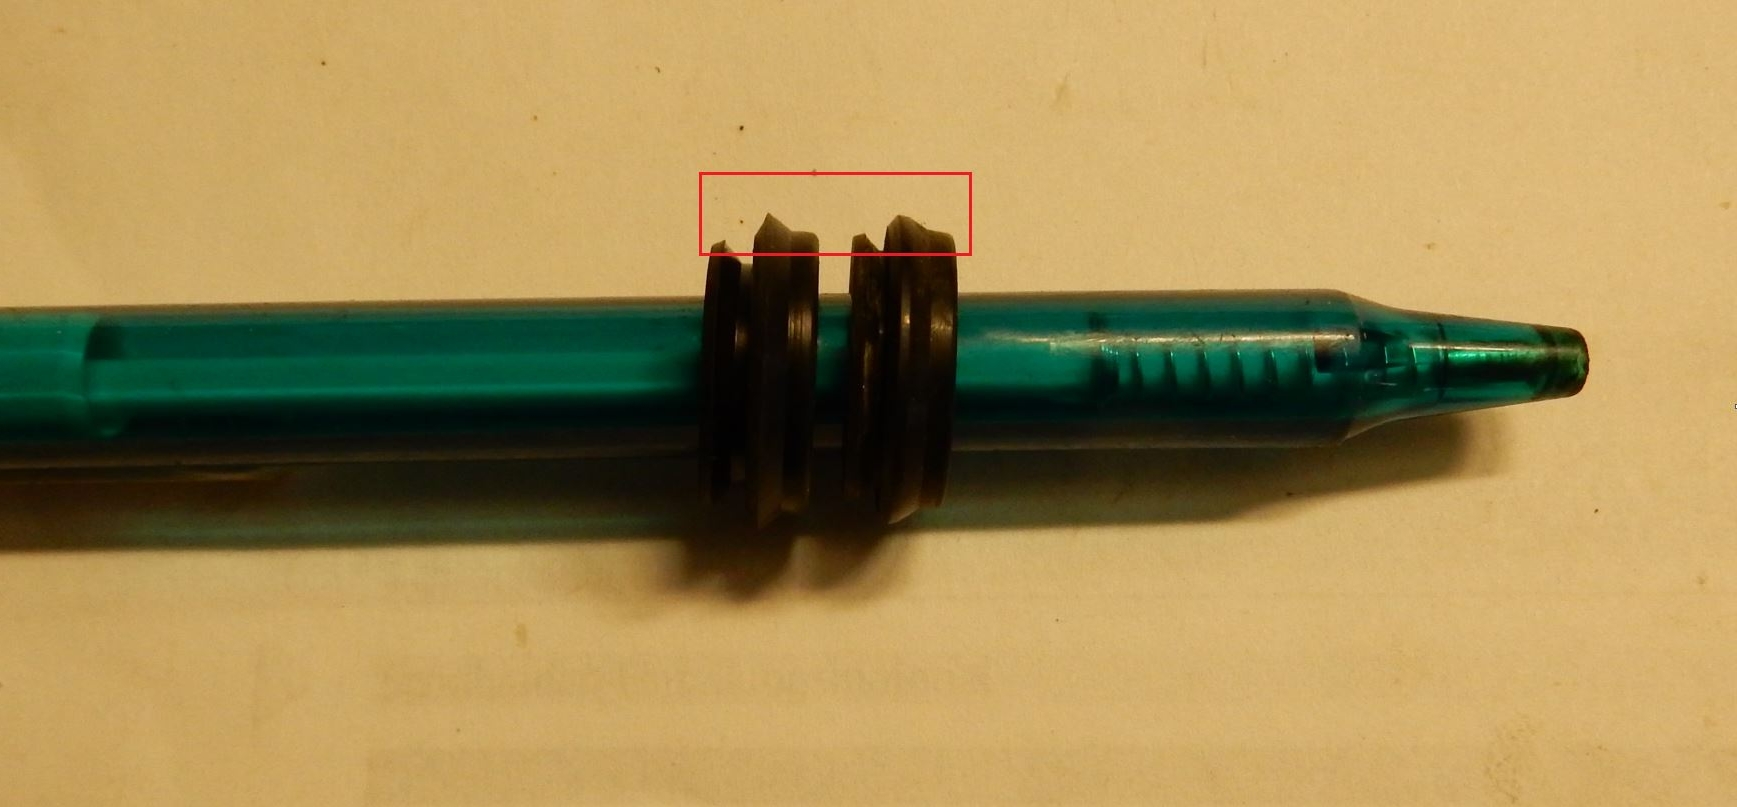
Here an example sealing lips new (left) und worn out (right):
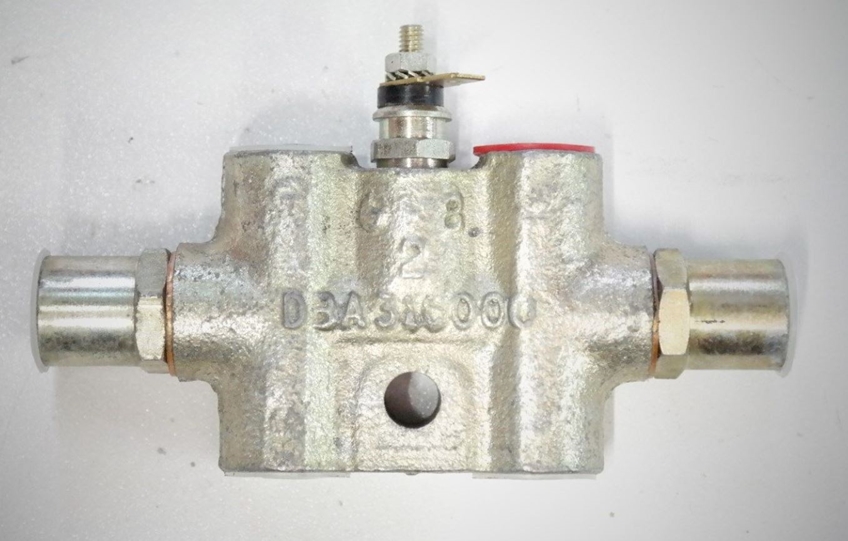
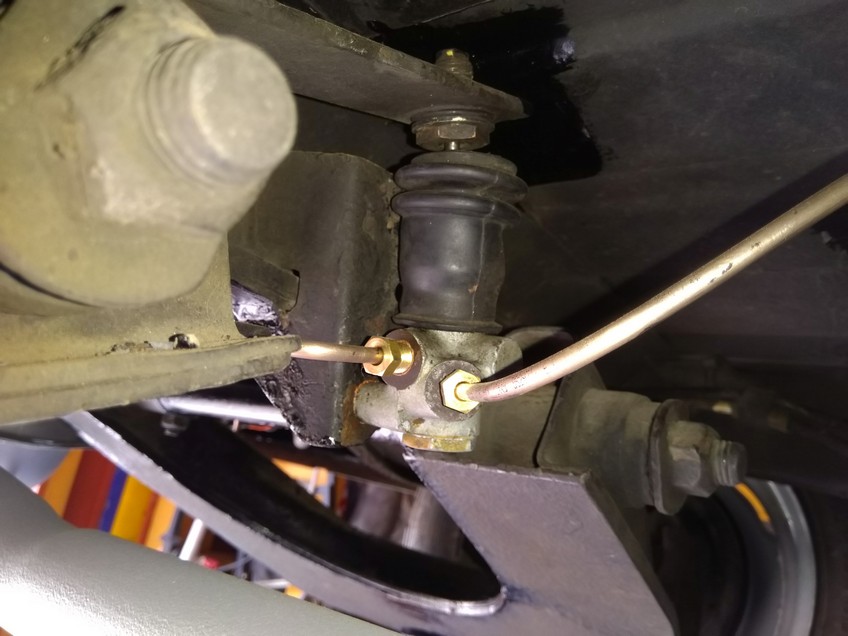
Double Circuit Pressure Drop Contact
In addition, the Estafette double circuit brake system has a pressure drop contact (differential pressure warning switch): if there is a pressure difference between the first circuit (yellow*) and the second circuit (black), the pressure drop contact (red*) switches to ground and the warning light in the dashboard lights up (red*)
* top of page – second drawing
The dashboard warning light is installed in a toggle switch, so you can check if the bulb is ok. On WWW there is little information on such pressure drop / pressure difference warning systems – a similar one to Estafette was available for Opel Rekord/Ascona in the Swedish version
http://www.simca-competition.com/t12542p50-soucis-frein-bocal-1-se-rempli-bocal-2-se-vide
Or the one at the Simca and Renault Alpine:
https://alpinea310ve.blogspot.com/2017/05/icp-indicateur-de-chute-de-pression.html
Function
The two pistons yellow/grey (2) are centered by springs (3).
If one side get a pressure reduction the oposite piston is pressed against the contact pin (1) in the middle. For a correct function the O-rings (4) and the bore must be in order:
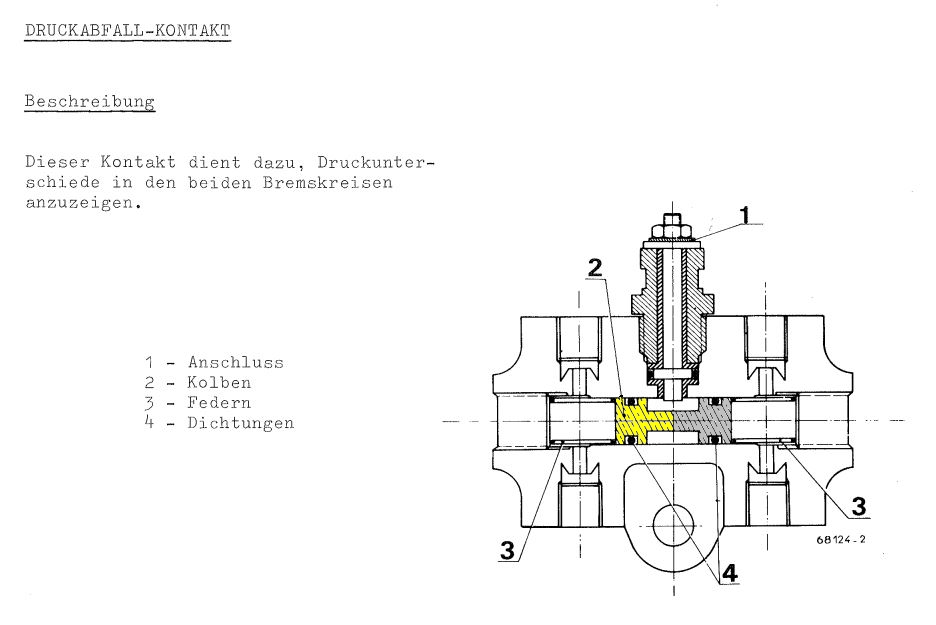
The pressure drop contact must be mounted at an angle of 30 degrees
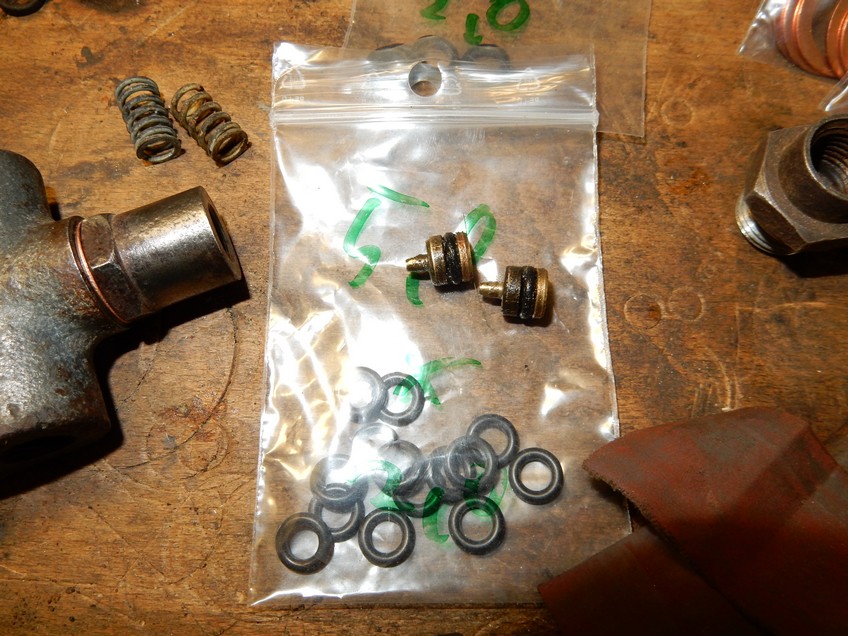
Part Number
Renault: 7 701 018 641
Bendix: 683 058B (not verified myself)
https://vehicules-anciens.fr/fr/shop/estafette-renault-freinage-icp-indicateur-chute-pression
Test pressure drop contact and the indicator light in the dashboard
Slightly unscrew the bleed screw on one of the front brake cylinder-chambers this cause a small leak. After that switch on the ignition and apply the brake – the warning lamp must light up. After that tighten the bleed screw and slightly open one of the bleed screws on one cylinder of the second circuit and check warning light again. The smaller the leakage, the higher the brake pressure must be to build up sufficient pressure difference.
Rework pressure drop contact
According to MR128 it must not be dismantled. The question is what to do if no new part is available ?
– just ignore the 40-year-old, deformed, O-rings and the suspected deposits on the contact pin ?
– or better work up the pressure drop contact?
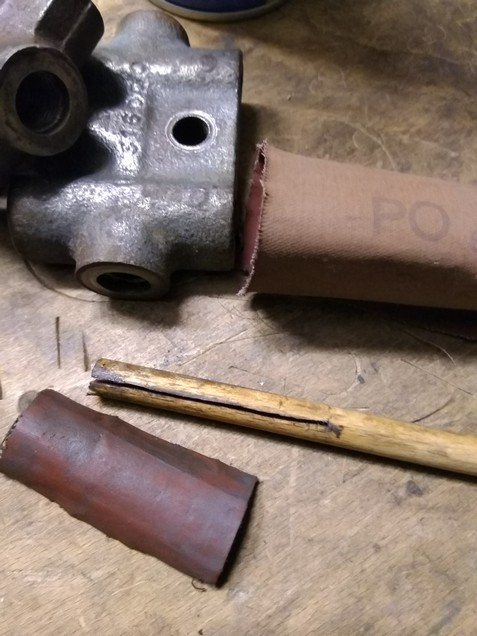
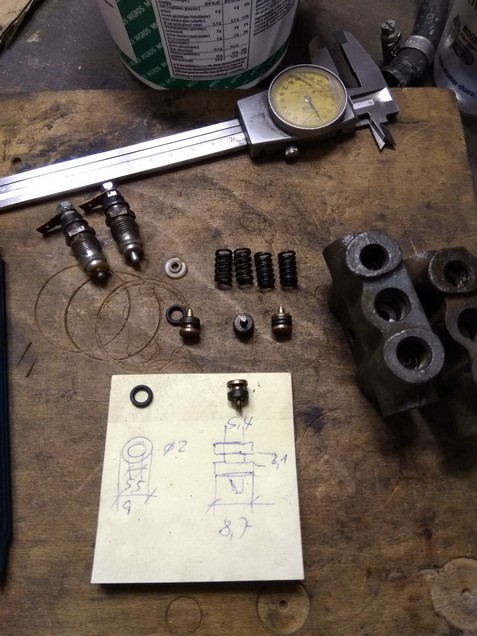
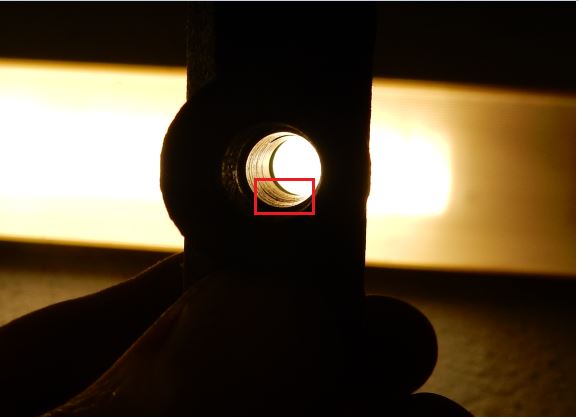
In the area of the sealing rings – like the main break zylinders – “Corrosion rings” may occur. On the 4 contacts I opened, 3 had visible annular indentations in the piston resting area, however on the “bottom” of the bore the corrosion was deeper. All had visible deformations on the O-rings. Due to the lack of an suitable honing tool, I made a honing stick out of 8mm round wood. I used polishing cloth to prepare the bores, on two of the contacts I had to use 300/400 grit abrasive cloth first.
On the Louise there were hardly any visible spots, here I just used polishing cloth and cleaned the bore and reassembled with new o-rings 5×9.
Before assembly the whole contact must be cleaned (i used methylated spirit from our Cheese-Fondue set :-)) and be “greased” with ATE brake paste .
After inserted the pistons, a reasonable resistance was still felt, which indicates that the O-rings have sufficient contact pressure.
But one has to be carful not to push the pistons too deep else the O-ring can be inured on the sharp edged contact-pin-bore.

Wheel Brake Cylinder
On Estafette models, different wheel brake cylinders were used. For details I would like to refer to Vehicule-Ancien: https://vehicules-anciens.fr/en/shop/brakes-parts-classified-by-models
Single-Circuit
Front Ø 28.57mm – cranked hose connection – from 1959 until 71 (two different versions)
Front Ø 28.57mm – angular hose connection – from 1972 until 76 (one version)
Rear Ø 22mm – from 1959 until 80 (three different versions)
On my Couchette from 1970, the cranked hose connection cylinders was mounted – Vehicule-Ancien provided me the latest model with angular hose connection (model from 72) – it’s a bit more tricky to screw in the hose but finally it worked 🙂 –> see Couchette: Couchette Breaks
Double-Circuit
Front Ø 28.57mm – with two hose connections – from 1972 until 80 (one Version)
Rear Ø 22mm – cylinder version from 1967 (last Version)
Dismantle Rusted Double-Circuit Wheel Brake Cylinder
The cylinders have two chambers and cannot simply be squeezed out. If the externally visible cylinder/piston edges are in good condition – i. e. are not rusted – they can usually be driven out with compressed air. If this does not work and you cannot loosen the pistons even by hitting them, the pistons are probably rusted tight. In such a case a repair kit with new pistons is due anyway – so you can confidently drill holes in the pistons, cut threads and pull out the cylinders – see Louise –> see Louise: Chassis & Brake

Wheel Brake Cylinder, Rework, Tolerance?
Honing with the (cheap) three-arm honing tools and new stones gives a pretty rough picture at the beginning. With a certain wear of the stones, the surface becomes finer, but does not come close to the fineness of new cylinders. Presumably the geometry/quality of the bore (ovality/conicity) also suffers if you remove a lot of material.
I have found no concrete information on how much honing is allowed in the Ø (tolerance limit), neither in the Estafette manuals nor on the WWW. In my experience with our Estafettes, 6-8 hundredths mm are possible. Depending on the situation, seemingly harmless rust spots can turn out to be quite deep trenches and reworking becomes pointless.
Repair Kit
Repair Kits rear
Renault 77 01 011 262 (Ø22mm)
Repair Kits front
Renault 7701200689
FRENKIT 328003 (Ø28.6 mm, not verified myself)
https://www.frenkit.es/en/brake-catalogue/online-catalogue/eu?stype=text&cat=&q=328003
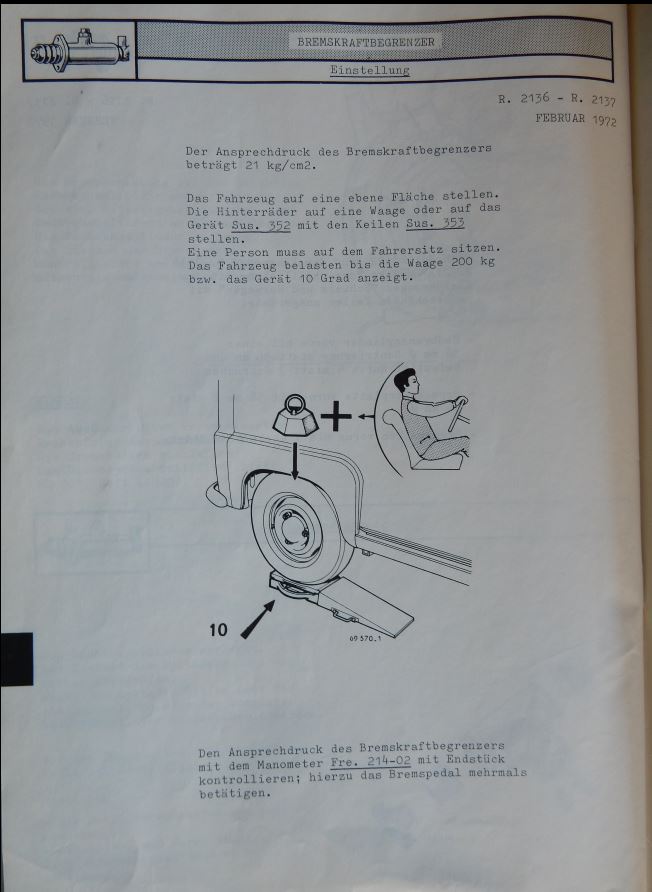
Rear Wheel Brake Force Limiter Valve
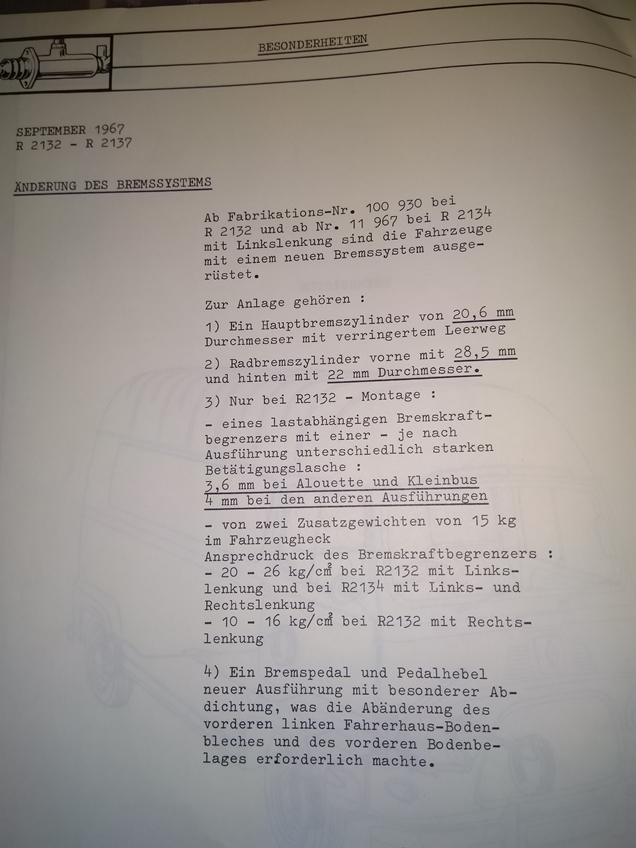
From 1967 onwards, a “brake force limiter valve” was installed, first on R2132 and later on all R2136/37. The control valve is attached to the rear axle and is opened via a spring steel flap at a certain axle load According to MR128 there are operating lashes with different thicknesses (3.6mm / 4 mm).
Wheel blocked
After this happens, the hoses are probably (inside) swollen – the brake fluid can no longer flow back and the wheel is blocked or tight gooing. This is not visible from the outside – the hoses seem to be in good condition, without cracks. This was the case with three of our Estafettes.
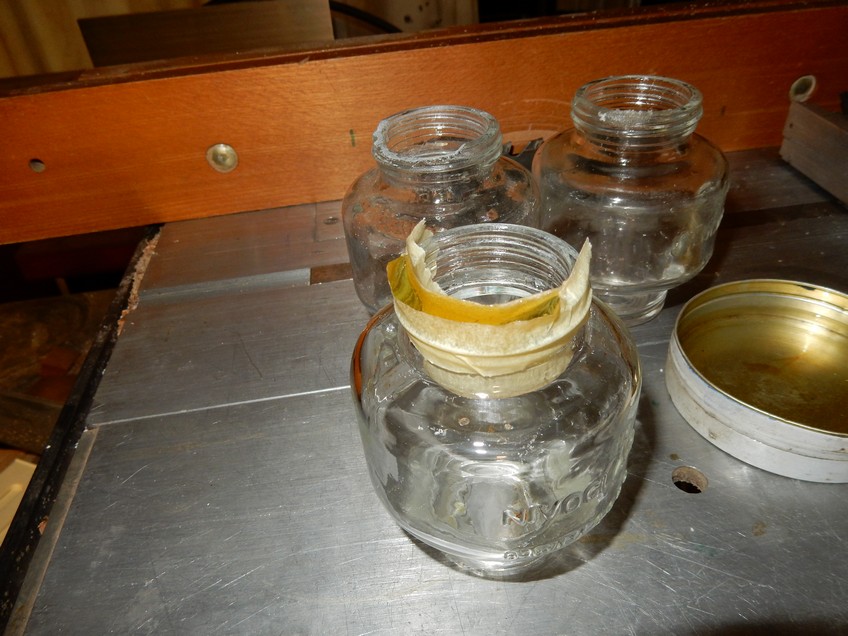
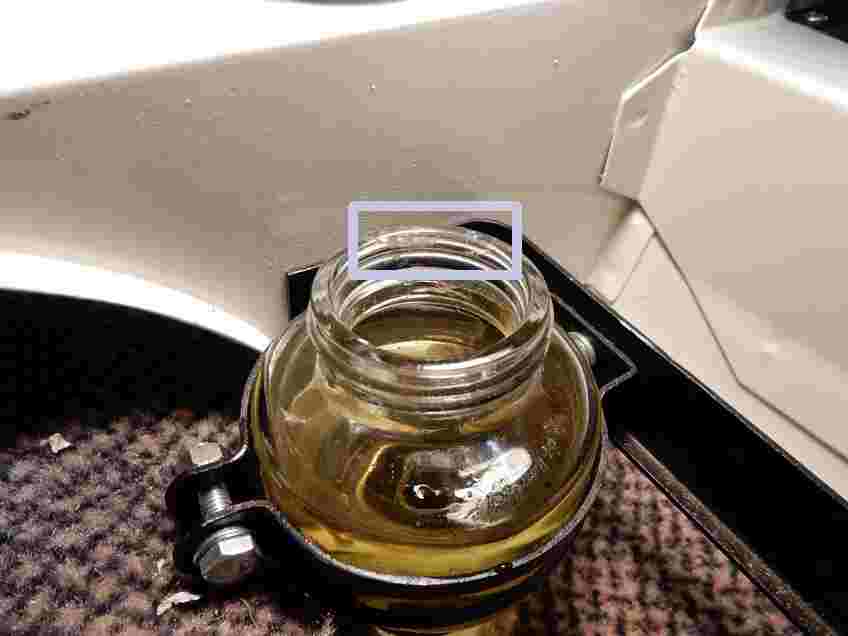
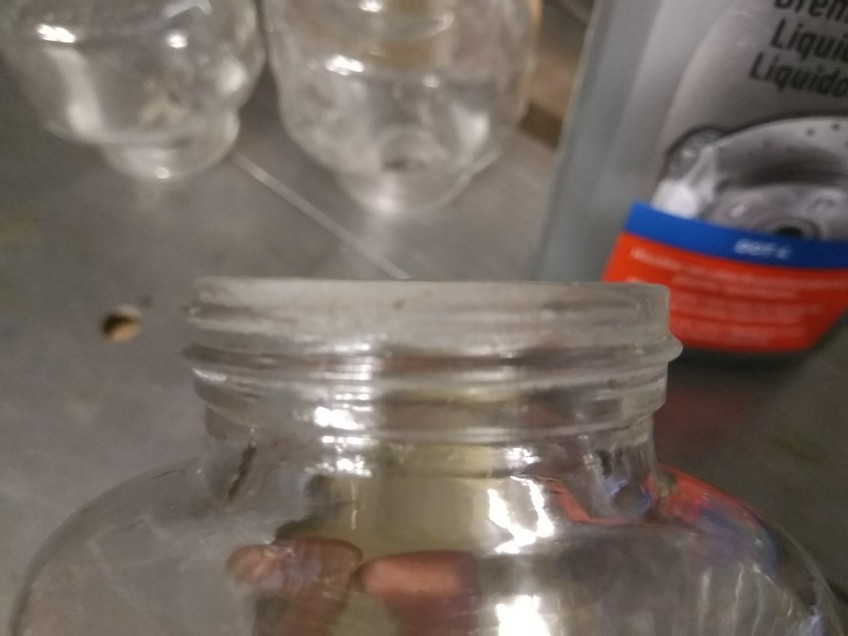
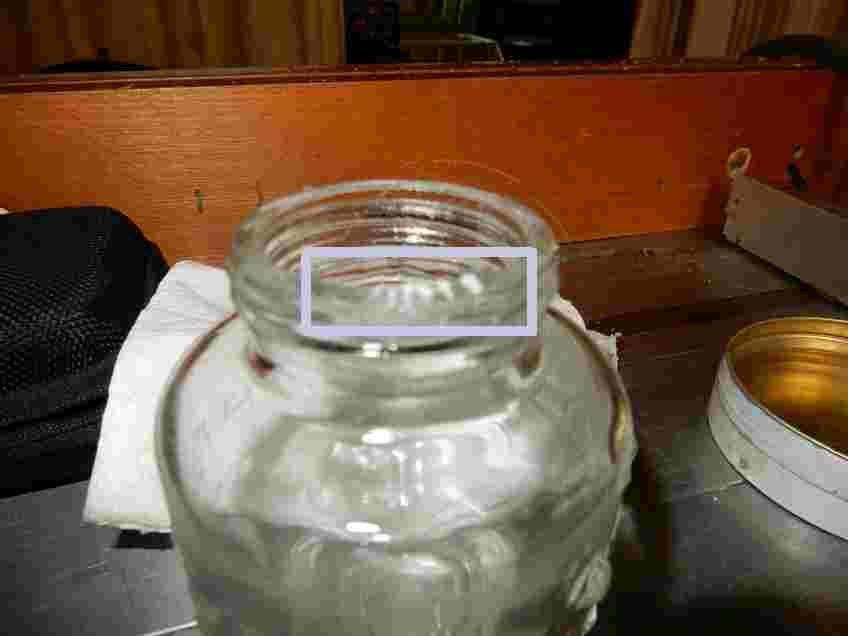
Bocal repair?
The “Bocals” are often broken – at the top where they should seal against the lid – mostly sharp-edged.
Bocals are therefore in short supply.
For Louise I had repaired the one bocal with epoxy two-component adhesive “known as Araldite. ” At Risk, without knowing if the epoxy is resistant to brake fluid. After 1.5 years the glued piece still holds perfect
It would be interesting if the epoxy also works as glass replacement
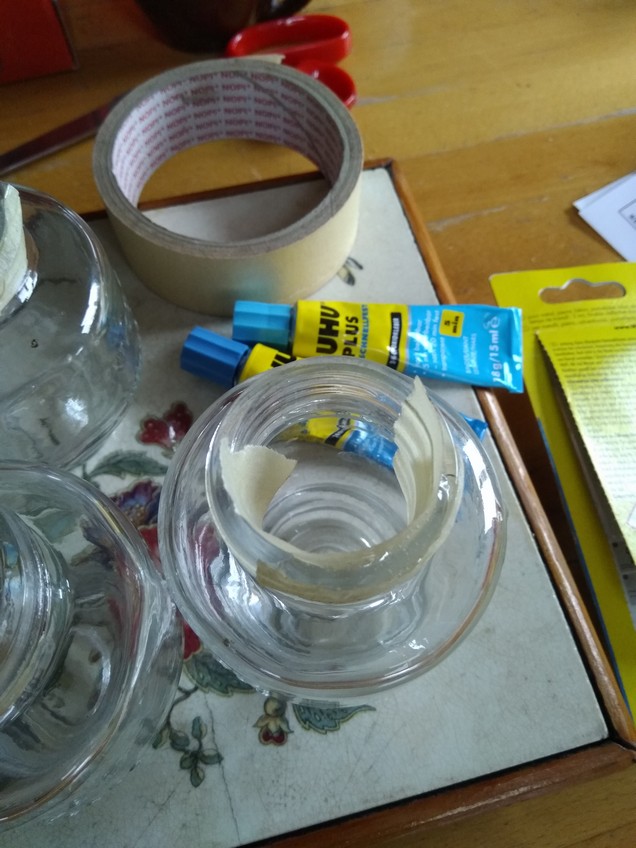
Try with Epoxy:
So i did repair a bocal with two-component adhesive (again UHU), rebuild the threads and inserted the bocal directly into brake fluid. Unfortunately, the epoxy softens after a day and can be easely scratched away with the thumnail.

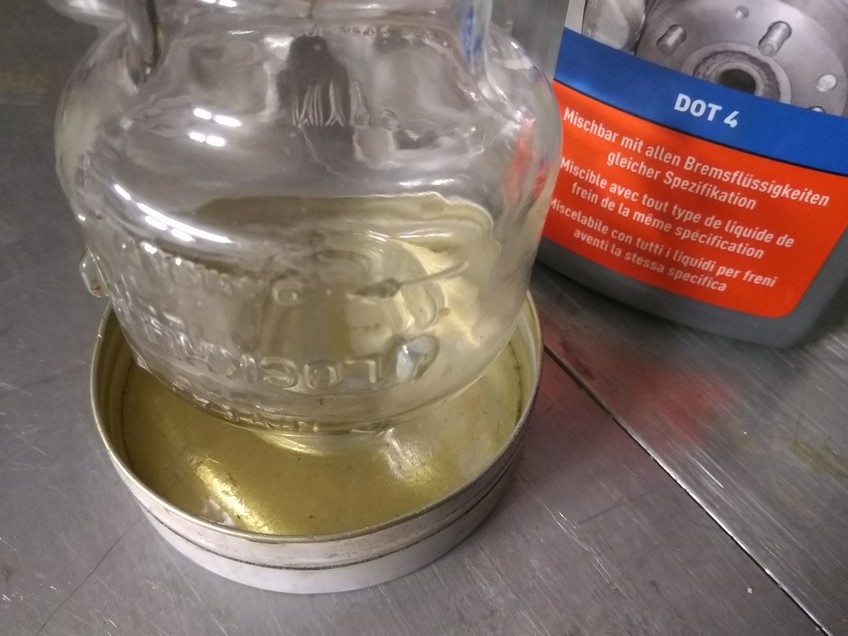
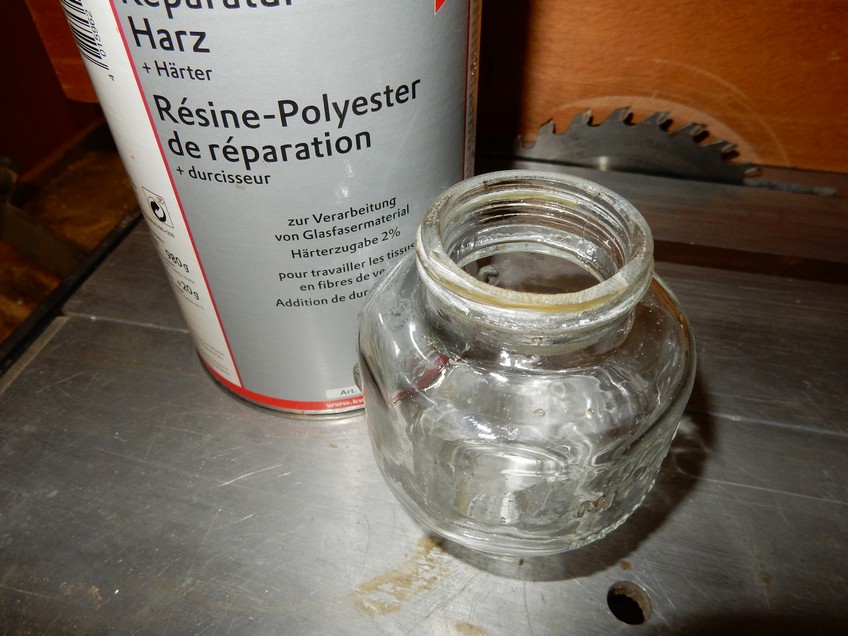
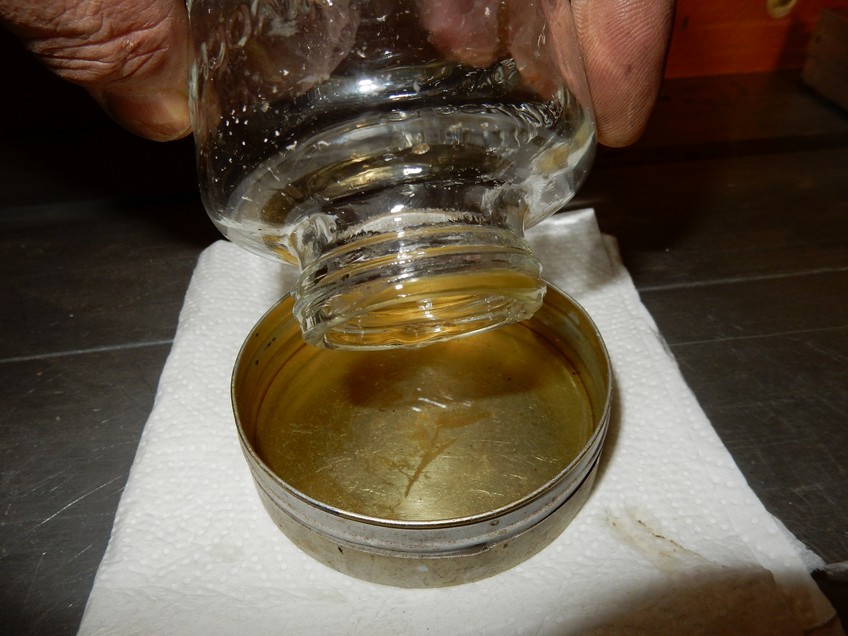
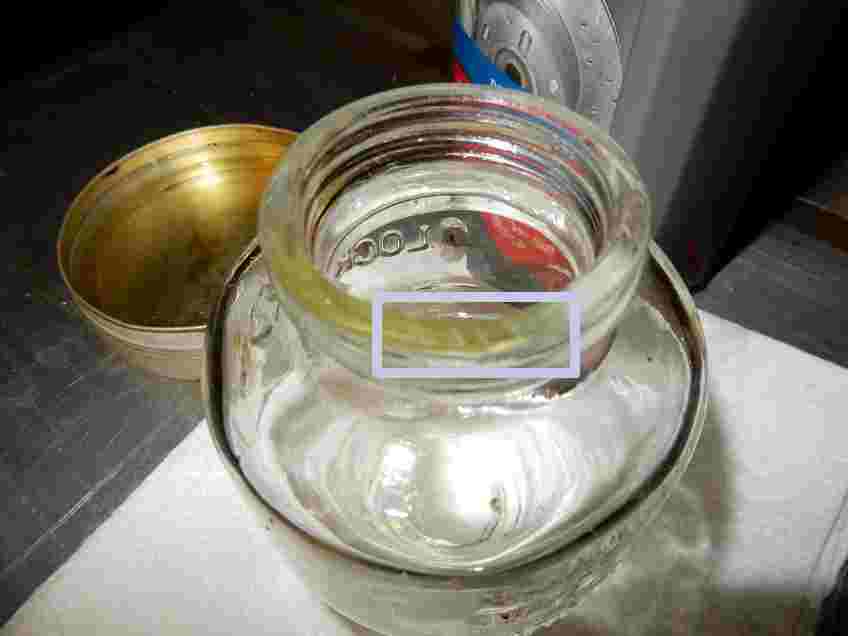
Try with Polyester:
The color is slightly yellowish, but this does not disturb. After a day in the brake fluid, the surface has (feeled) the same hardness.
I leave the Bocal in the brake fluid, let’s see . . . .